4 Ease Troubleshooting: Quickly Identify and Recover from a Failure
In the previous chapter, you have successfully configured screen monitoring notifications, which is an essential step. If you want to solve the on-site problems more efficiently, let’s learn how to remotely find the location and cause of a failure after receiving an alarm notification.
VNNOX Care displays the screen connection topology, operating status and fault details, which allows you to quickly find the location and cause of a fault, reducing troubleshooting cost and improving maintenance efficiency.
Applicable to app and web users
In this chapter, you will learn about the following:
- All monitoring information options and descriptions on the monitoring details page
- How to identify a problem after receiving an alarm notification.
- How to quickly recover a screen by using backup files.
# 4.1 Introduce Screen Monitoring
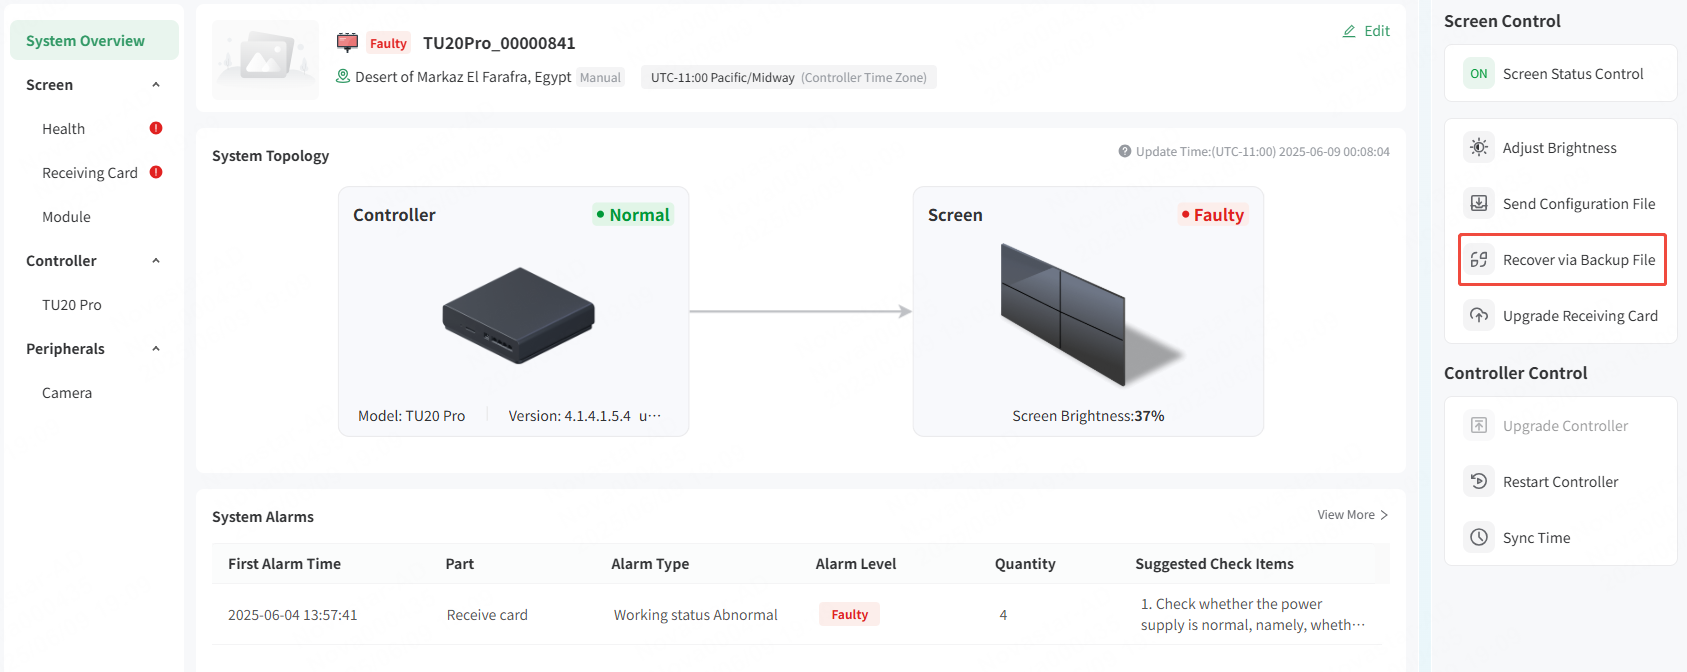
The Monitoring tab page displays the status and other information of the current screen, receiving card, module and controller. You can also manage the screen and controller, including display control, brightness adjustment, sending configuration files, recover the screen using backup files, upgrade the receiving card, sync time, restart and upgrade the controller, etc.
# 4.2 Identify Problems
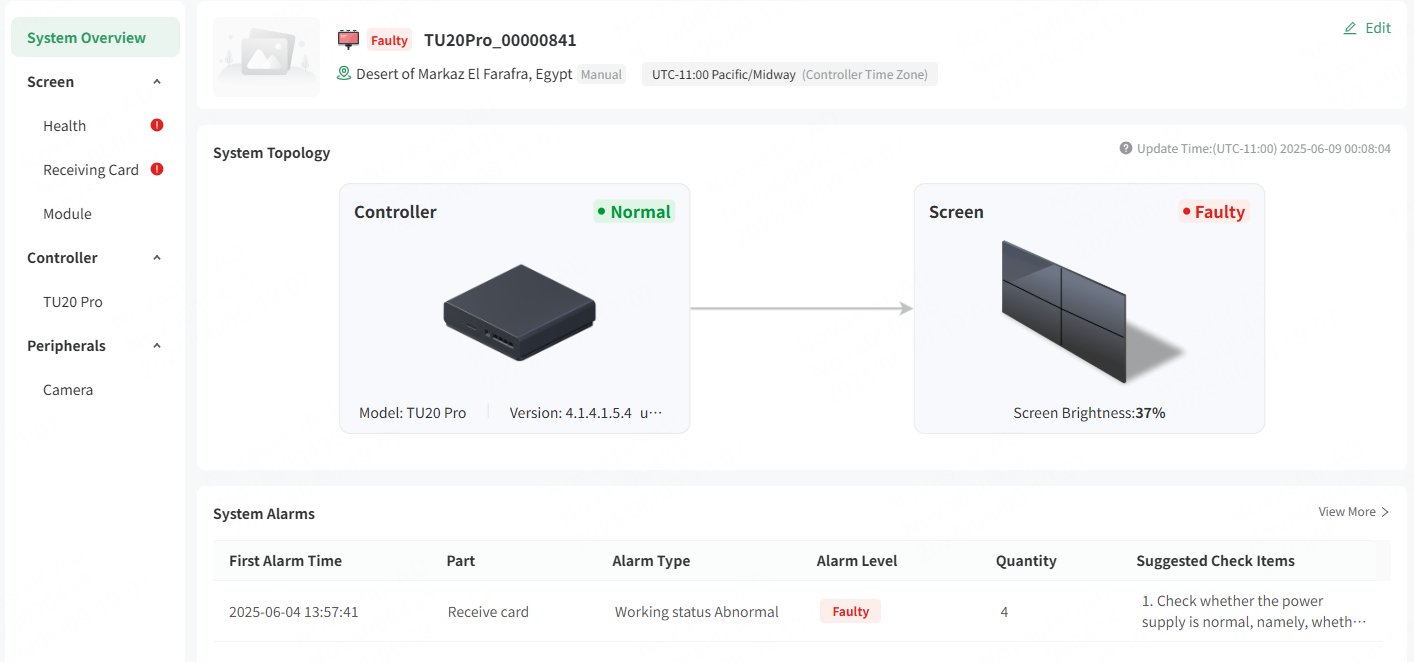
After receiving an alarm notification, view and click the faulty screen on the dashboard to access the system overview page and view the real-time operating status of each component of the screen. The faulty parts are displayed in red and the risky parts are displayed in yellow.
# 4.3 Recover a Screen
Send professional maintenance personnel to the site to check the corresponding faulty receiving cards. You will find that it is caused by a hardware failure and cannot be recovered directly.
Prerequisites:
- The faulty screen is bound to VNNOX Care by backing up the configuration file.
- Screens only of the asynchronous control system can be recovered with VNNOX Care.
- Screens of both synchronous and asynchronous control systems can be recovered with NovaLCT.
# 4.3.1 Recover Screens by Using VNNOX Care for Web
Prerequisites:
- The backup files is uploaded to VNNOX Care for web.
- During the recovery process, the device remains powered on and connected to the internet, and is not restarted.
- Select the Monitoring tab and click Recover via Backup File in the Screen Control area on the right of the page that appears.
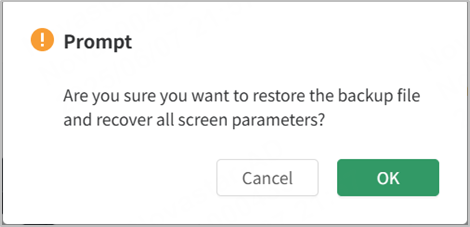
- In the window that appears, click OK to restore all the screen parameters.
# 4.3.2 Recover Screens by Using VNNOX Care App
- Open VNNOX Care app and log in.
- On the Local Config tab page, tap a connected device and choose Configure > Upgrade & Maintenance > Recovery.
- Tap Recover.
If the screen fails to recover, check whether device connection is stable and network connection is normal, then go back and try again.
# 4.3.3 Recover Screens by Using NovaLCT
- Manually replace the faulty receiving cards.
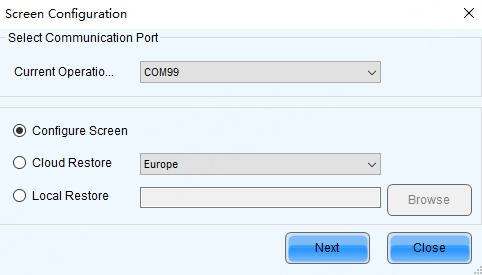
- Log in to NovaLCT and access the screen configuration page.
- Select a recovery methods.
- Cloud Restore: Load the backup file uploaded during binding.
- Local Restore: Select the downloaded backup file.
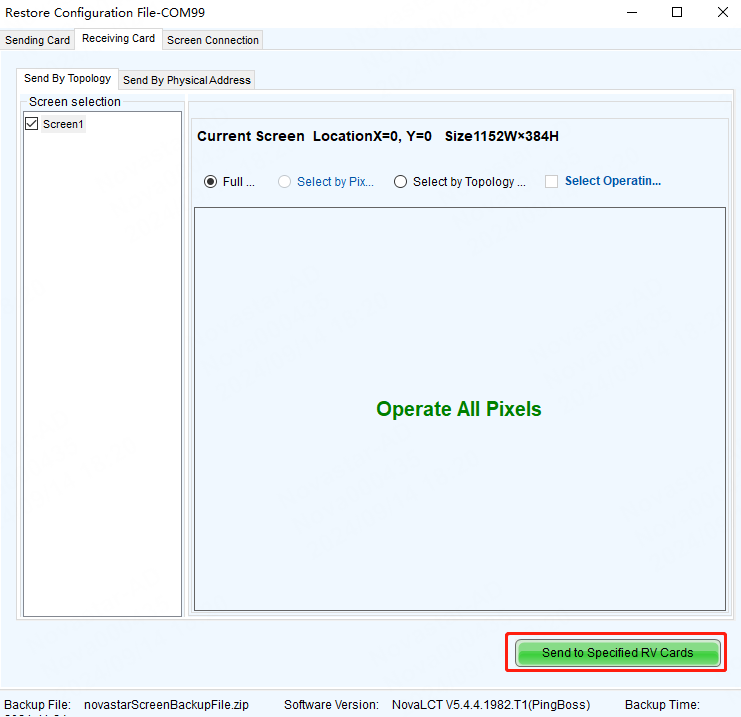
- Select the Receiving Card tab and click Send to Specified RV Cards.
The figures below takes cloud recovery as an example:
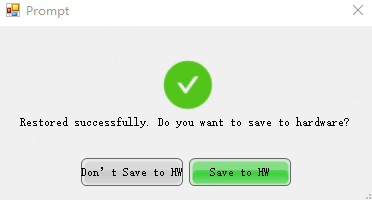
- Click Save to close the window. The screen is recovered.
The figures below takes cloud recovery as an example: