
1 Start from Online Screen Management
Welcome to VNNOX Care, a professional cloud platform designed for LED screen service providers to manage the operation and maintenance of LED screens.
No matter what your business development is based on, the pre-sales plan, construction deployment, screen data management, screen status monitoring, or after-sales maintenance of screens, systematic management of maintenance is indispensable. VNNOX Care comes with a simple and flexible management approach allowing you to easily create your own operation and maintenance management system that can improve the efficiency, lower service costs, and create value for the enterprises through services.
Now, let's get started with VNNOX Care.
Applicable to app and web users
This chapter uses the methods to bind screens to VNNOX Care during construction and back up screen data to the cloud as examples to show you how to quickly set up the VNNOX Care system.
- Basic service structure and concept of VNNOX Care
- How to quickly bind a screen to VNNOX Care during construction
- How to back up screen data and manage screen data with VNNOX Care
# 1.1 Service Structure of VNNOX Care

VNNOX Care for web consists of the following:
- Screen Operation & Maintenance: Offers a clear overview, presenting the distribution and real-time operational status of screens, and the number of screens in each status. It supports all-round monitoring and maintenance of the screens and their controllers and peripherals, allowing users to view and manage their status and information. In the event of a malfunction or anomaly, the system initiates alarms of varying degrees according to predefined rules, records the alarm history, and enables users to customize thresholds and rules per device and scenario for precise, personalized alarm management.
- Project Solutions: Allows pre-sales solutions to be generated automatically. Users can enter the necessary information for a project and various solutions will be recommended through the intelligent algorithm. A solution contains the screen information, required devices, connection diagram, etc. and can be downloaded as a PDF file or shared via a link, offering a professional reference for pre-sales, sales and after-sales.
- File Center: Allows users to select from standard configuration files of manufacturers, program packages, and personal files as needed. Users to create new folders, upload configuration files, and upload local folders without changing the directory structure in Personal Files.
- Permissions: Allows users to create sub-accounts, assign permissions to the accounts, and associate them with screens.
- System: Allows users to configure personal information and manage application settings.
# 1.2 Data Structure of VNNOX Care
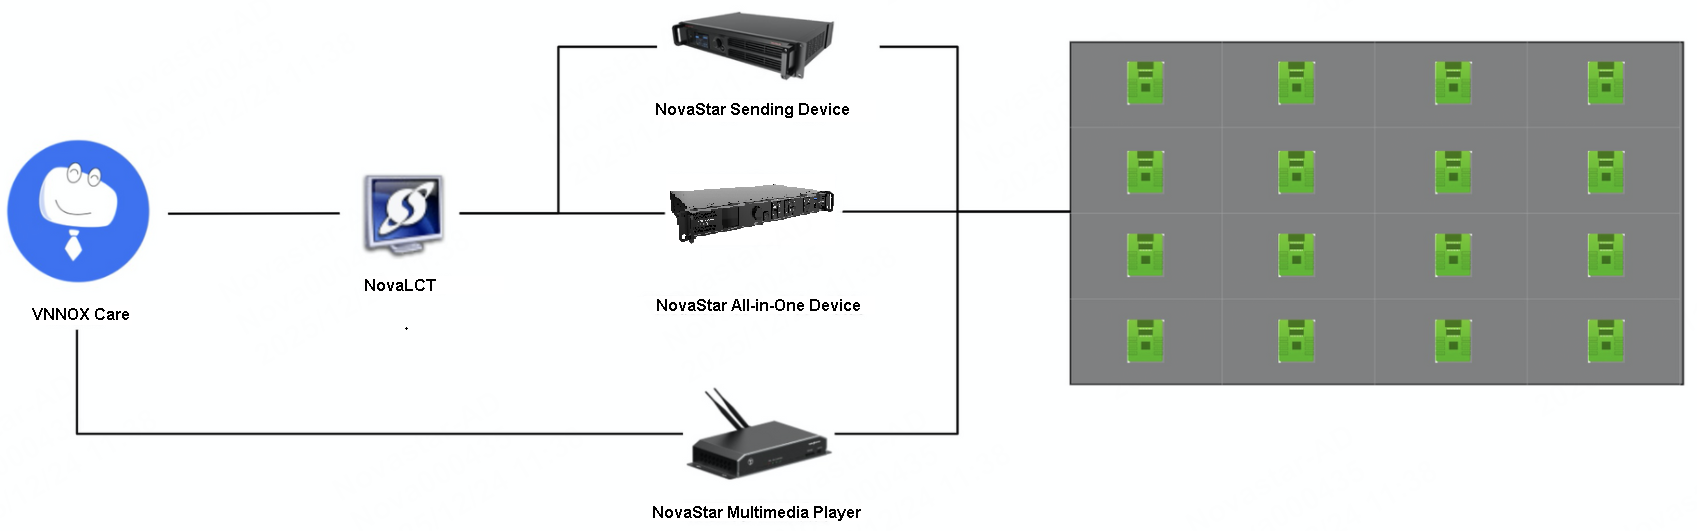
The screen data transmission allows screen data to be reported and monitored according to the different types of controllers.
# 1.3 Signup and Login
# 1.3.1 Signup
- Visit www.vnnox.com (opens new window) and choose Product > VNNOX Care.
- On the page that appears, click Apply for Account and select a server node.
- Enter an email address or phone number to get a verification code. Select Accept Terms of Service and Privacy Policy and click Next.
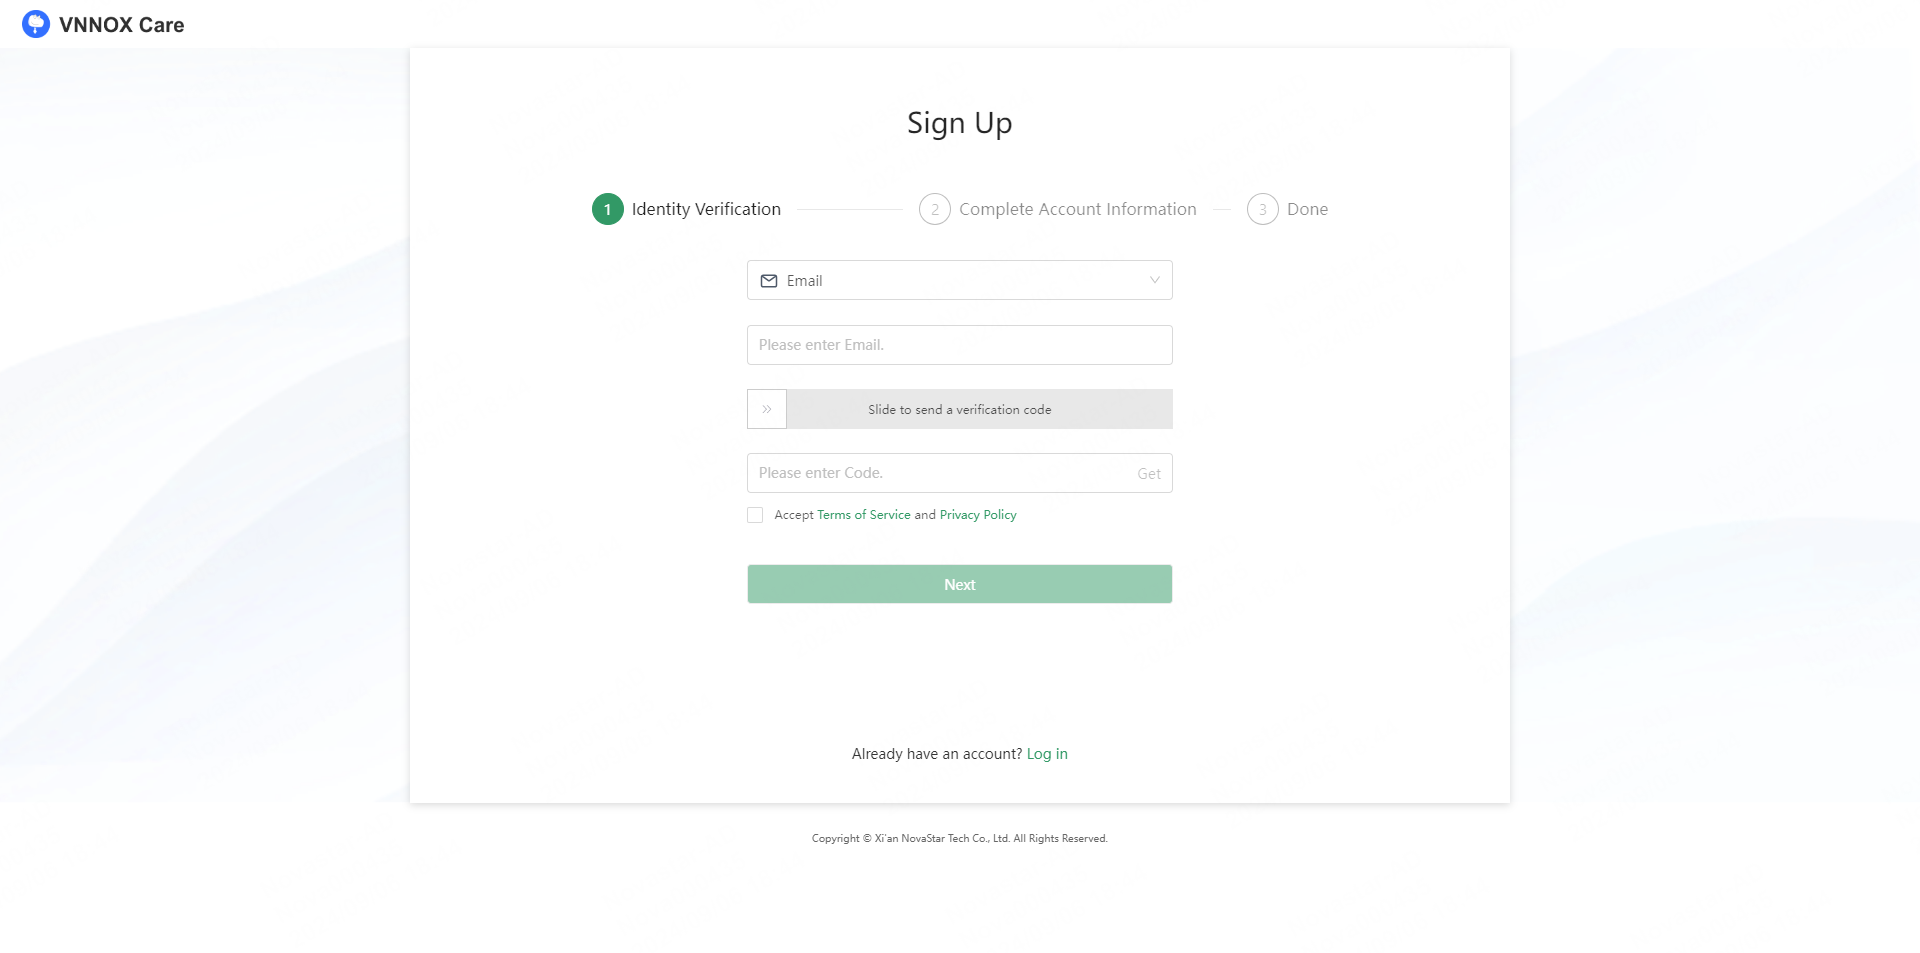
- To use the platform in collaboration with other enterprise members, fill out the following information, allowing us to find your enterprise and link your account with it accordingly.
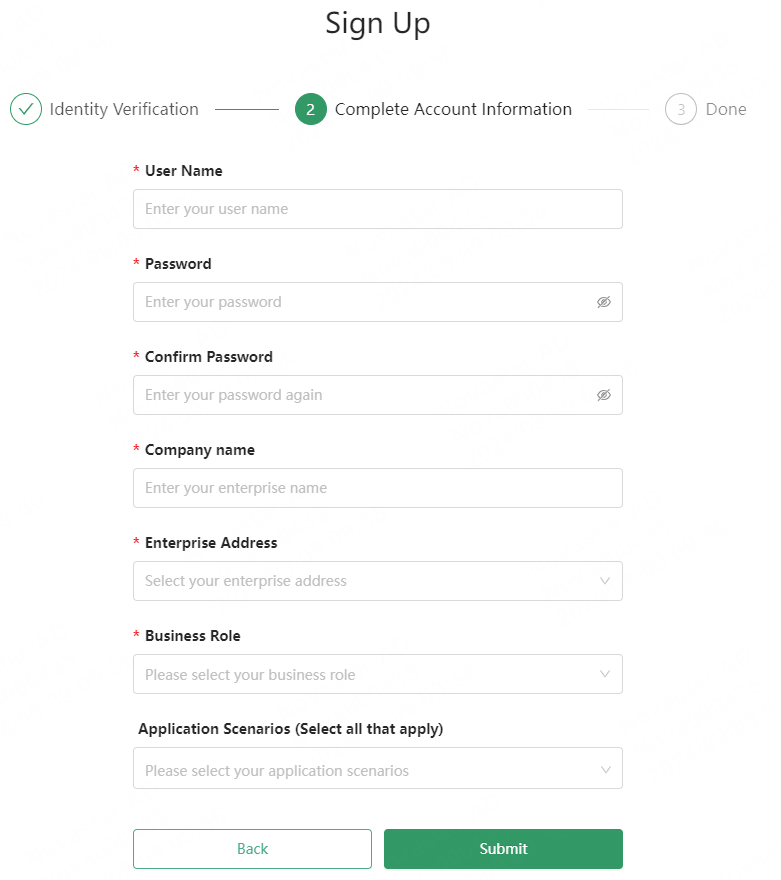
- After the account information is completed, click** Submit**.
# 1.3.2 Login
- Visit www.vnnox.com (opens new window) and choose Product > VNNOX Care.
- On the page that appears, click Log In and select a server node.
- You can log in to VNNOX Care via any of the following methods:
- Password
Log in with your registered phone number/email address/user name and the password.
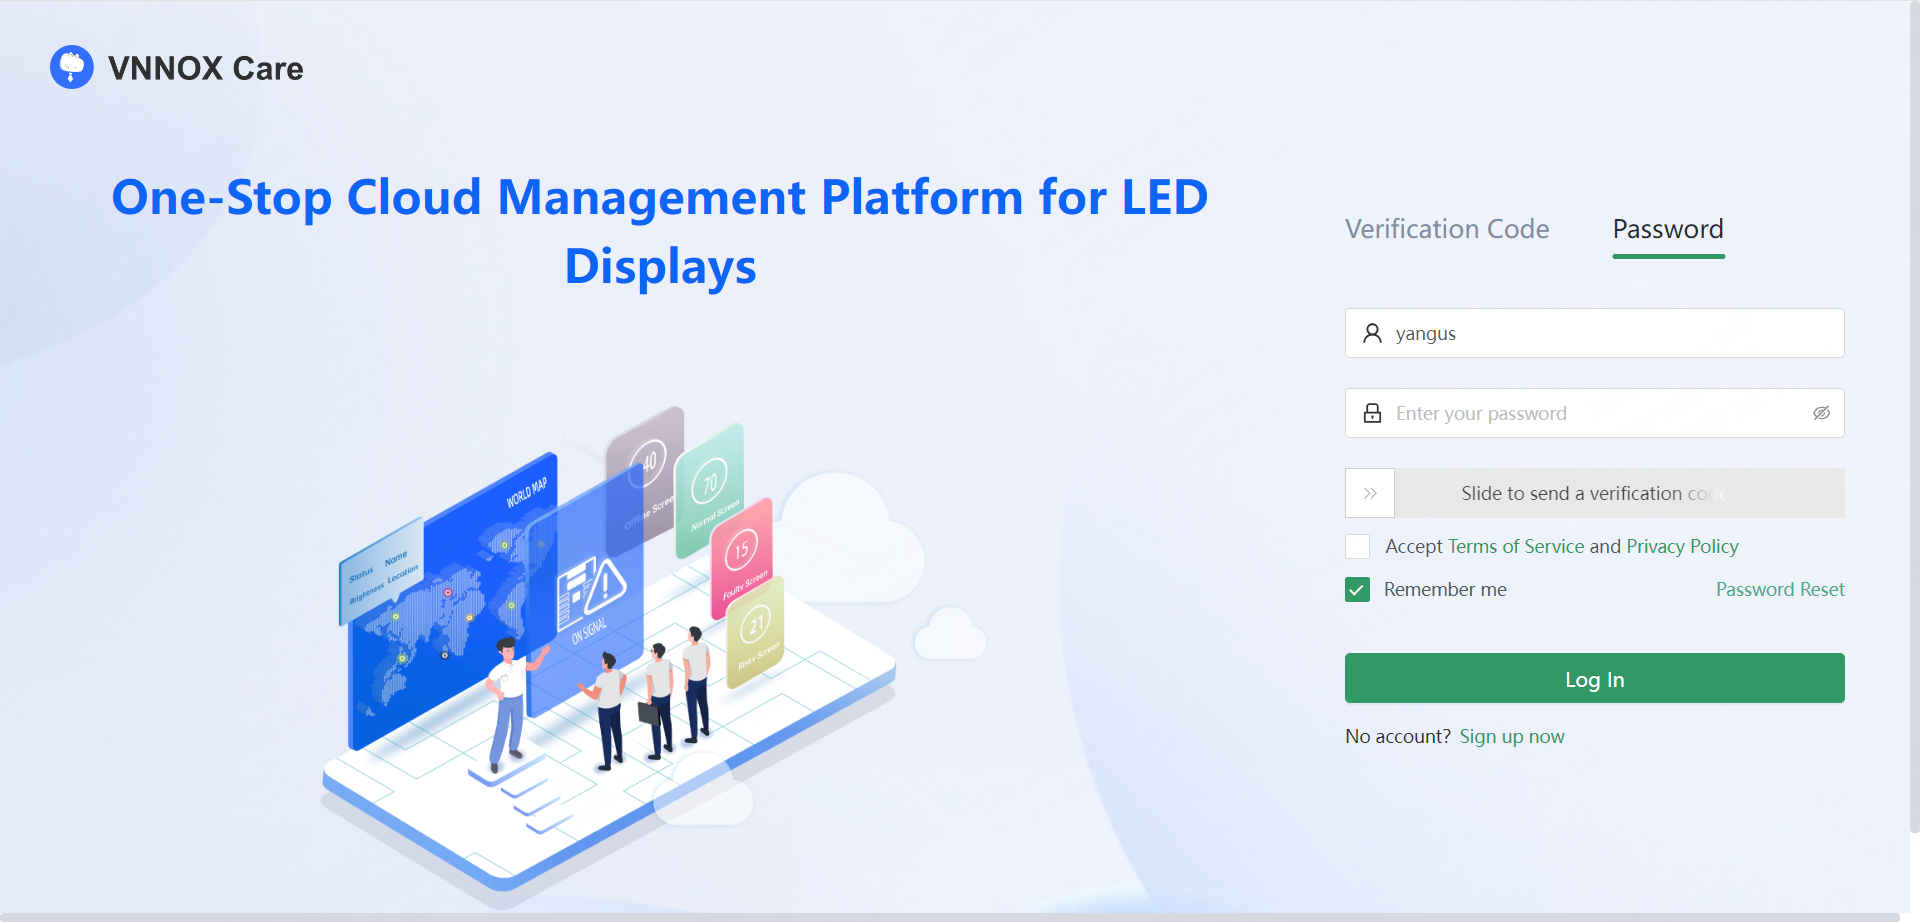
- Verification code
Log in with your registered email address/phone number and a verification code.
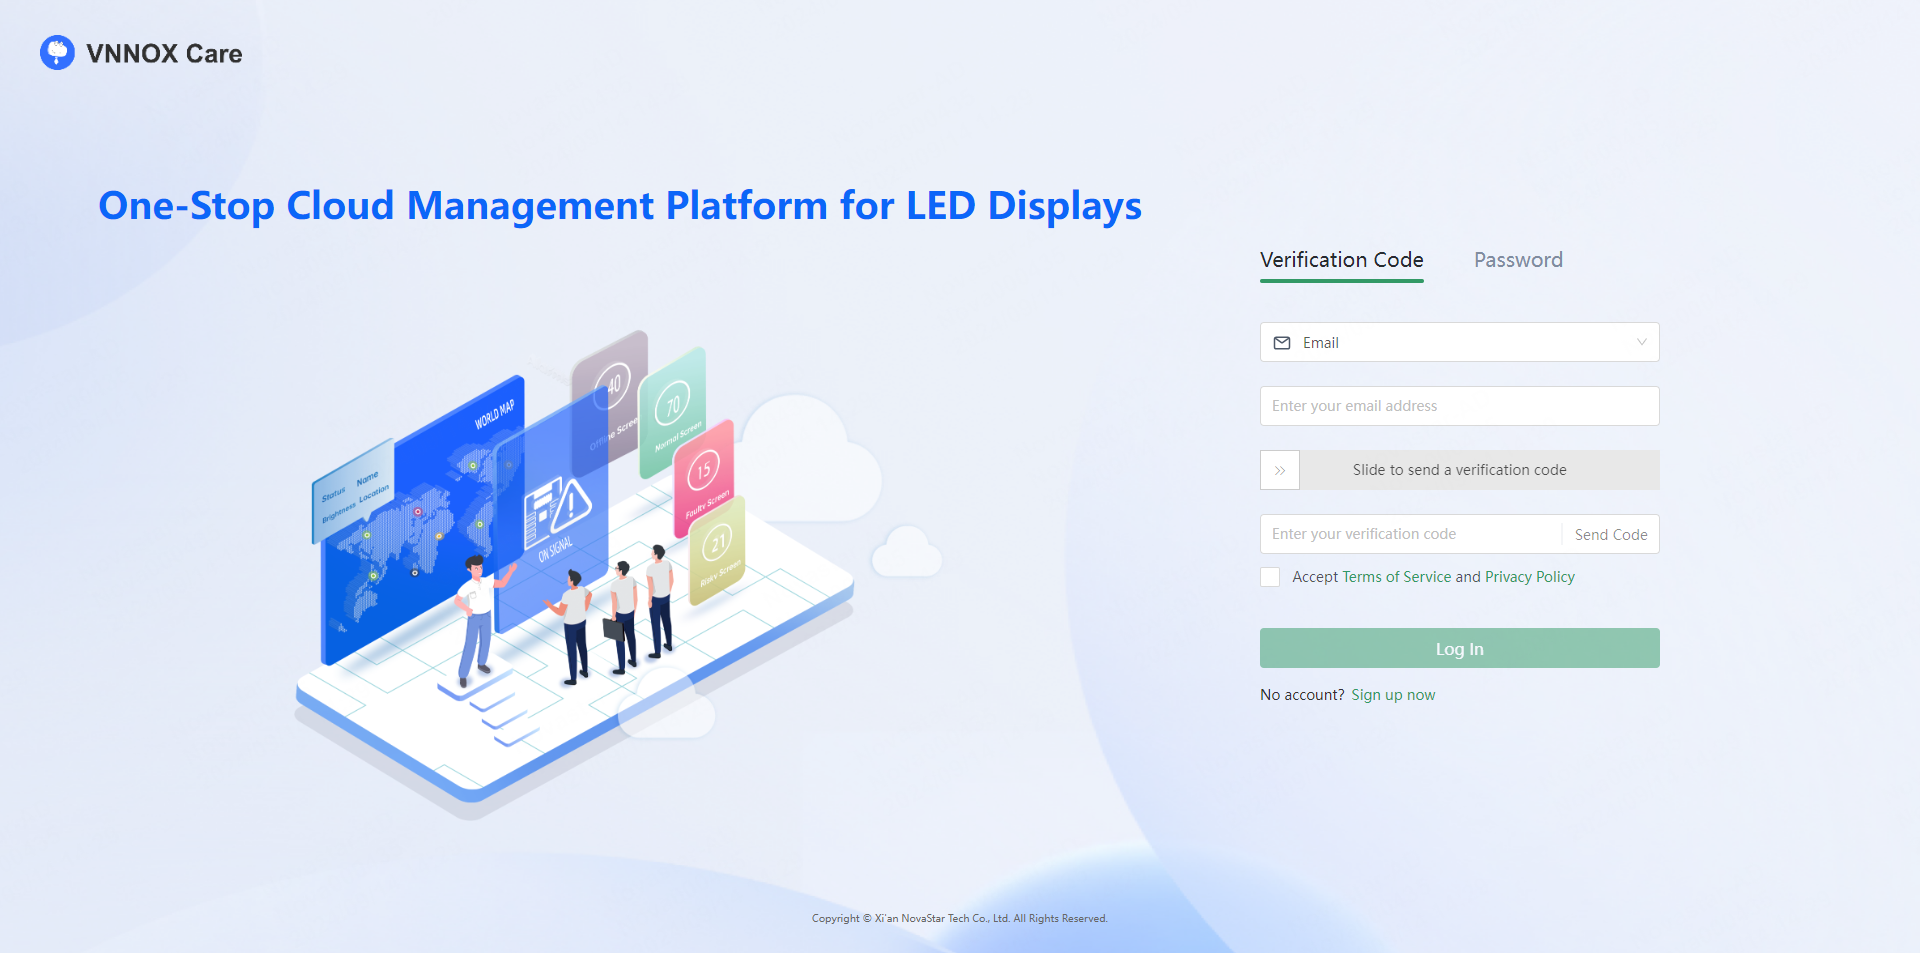
If you don't have a VNNOX Care account, click Sign up now to create an account.
# 1.4 Quickly Bind a Screen to VNNOX Care During Installation
You have learned about the basic structure of a screen. Before you get started with VNNOX Care to manage a screen, the first thing to do is to bind the screen to VNNOX Care during installation.
Prerequisites:
- The screens you want to bind to VNNOX Care are configured.
- You already have obtained the account information of VNNOX Care, including an access URL, user name and password.
- Screens only of the asynchronous control system can be bound to VNNOX Care using VNNOX Care app.
- Screens of both the synchronous and asynchronous control systems can be bound to VNNOX Care using NovaLCT.
- To bind screens of the asynchronous control system, the devices must be V3.3.0 or later.
# 1.4.1 Import Devices from VNNOX
Devices can be directly imported from VNNOX to VNNOX Care. This allows a large number of fixed installation screens that use VNNOX for content publishing to be bound to VNNOX Care, enabling monitoring and maintenance through VNNOX Care without the need for re-binding. This seamless process provides a comprehensive service from publishing to monitoring and maintenance.
Prerequisites:
The devices are not bound to other VNNOX Care accounts.
- The firmware versions of the devices must meet the following requirements:
- On the homepage, click Import Devices from VNNOX at the top right or choose Screen O&M > My Screens > Add Screen > Import from VNNOX.
- In the window that appears, enter your VNNOX account and password and click OK to log in.
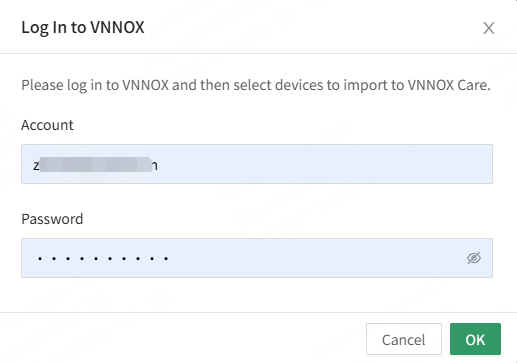
- Select the devices you want to import and click OK.

Click View Details to see the supported device models and their versions.
# 1.4.2 Bind Screens to VNNOX Care by Using the App
- On the Local Config tab page of VNNOX Care app, tap a connected device to access the device details page.
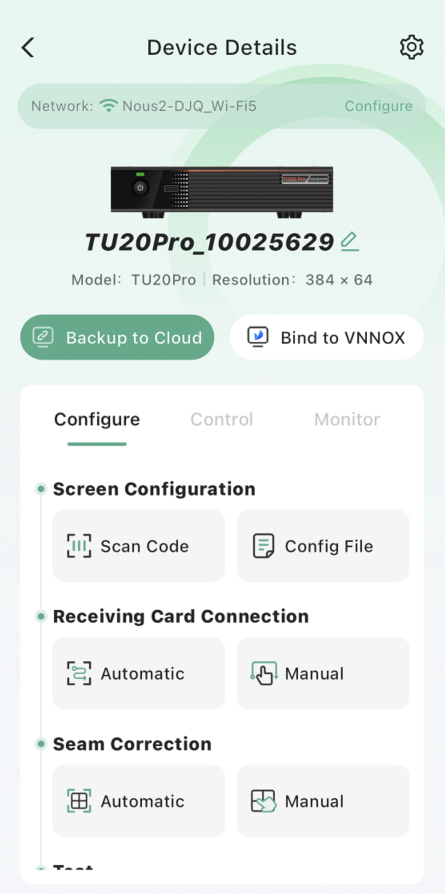
- Tap Backup to Cloud. After the configuration file readback is done, select a node and enter the user name and password.
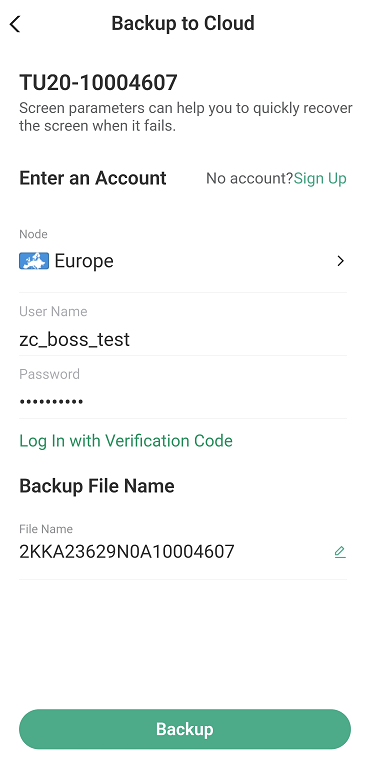
- Tap Backup to back up the configuration files to the cloud.
- If the phone is connected to the Internet, the screen is successfully bound to the cloud and you can monitor the screen with VNNOX Care.
- If the phone is not connected to the Internet, the screen cannot be bound to the cloud. Check your phone network connection and try again. You can also back up the configuration files after the phone has Internet access.
# 1.4.3 Bind Screens to VNNOX Care by Using NovaLCT
Users can do any of the following to bind screens to VNNOX Care by using NovaLCT (V5.4.3 or later) .
- If there is Internet access, bind screens to VNNOX Care by backing up configuration files to cloud.
- If there is no Internet access, export screen monitoring files and then import the files over the Internet to bind screens to VNNOX Care.
Online Binding
- After the screen configuration is done, click Save System Configuration File on the screen configuration page of NovaLCT.
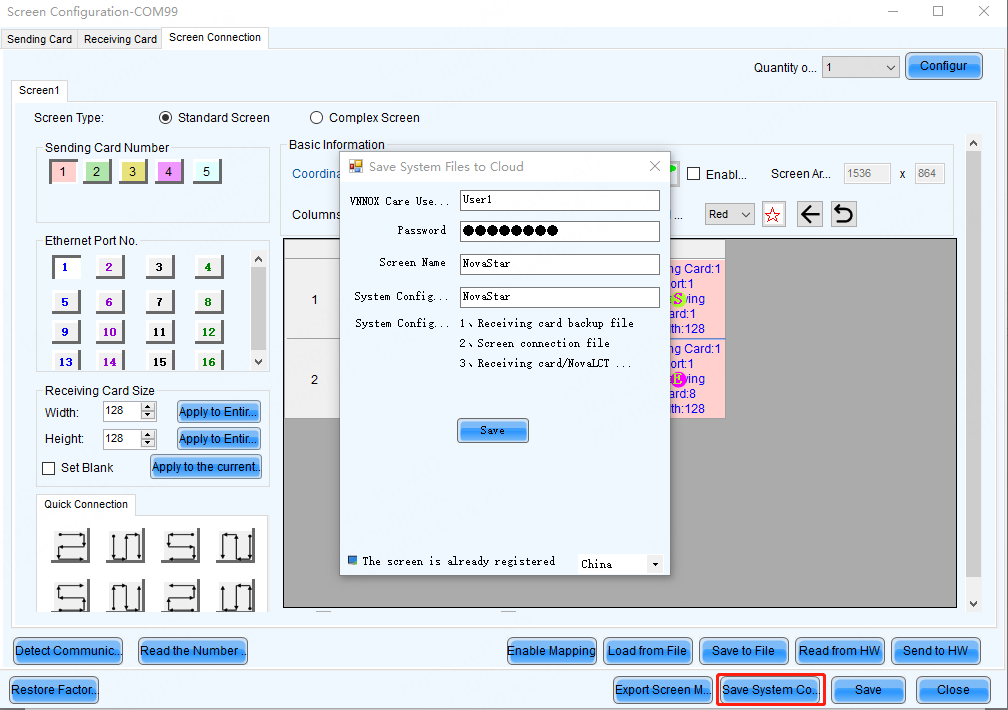
- In the window that appears, select a server, enter the login user name and password for VNNOX Care, and specify a screen name and system configuration file name.
- Click Save to save the system configuration file to the cloud and automatically bind the screen to VNNOX Care.
Offline Binding
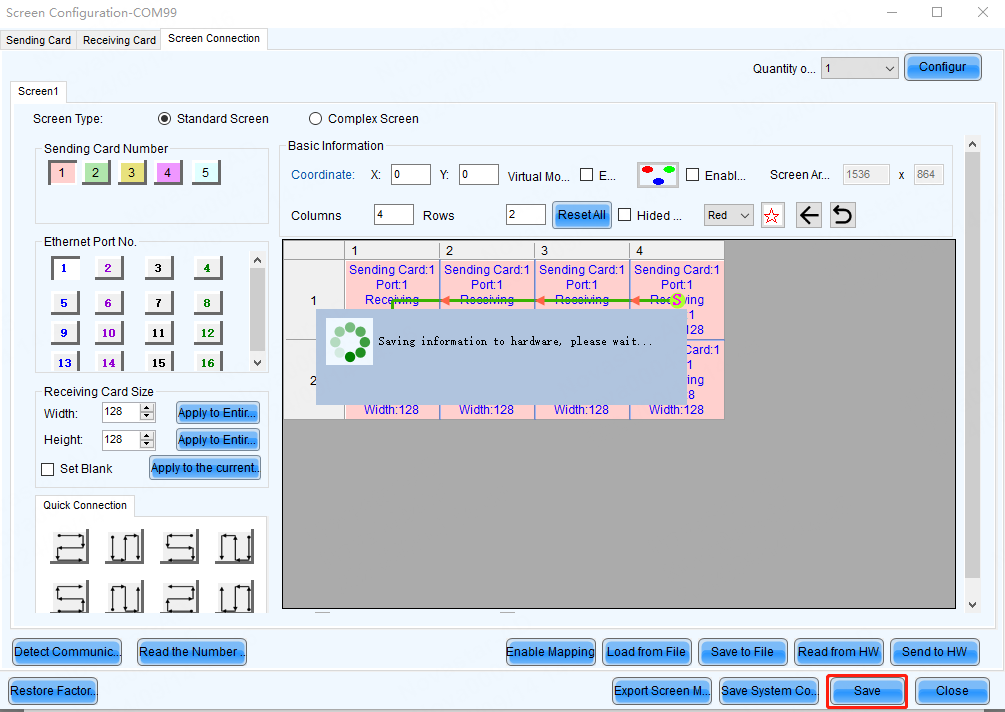
- After the screen configuration is done, click **Save **on the screen configuration page of NovaLCT to automatically save the monitoring data of the currently connected screen.
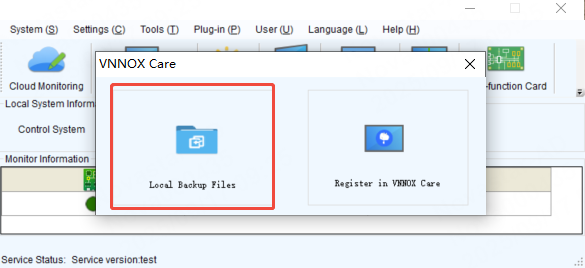
- When the Internet access is available, log in to NovaLCT and choose Cloud Monitoring > Local Backup Files.
- Enter remarks. The remarks will be used as the screen name after successful binding. If it is empty, the device's SN will be used as the screen name.
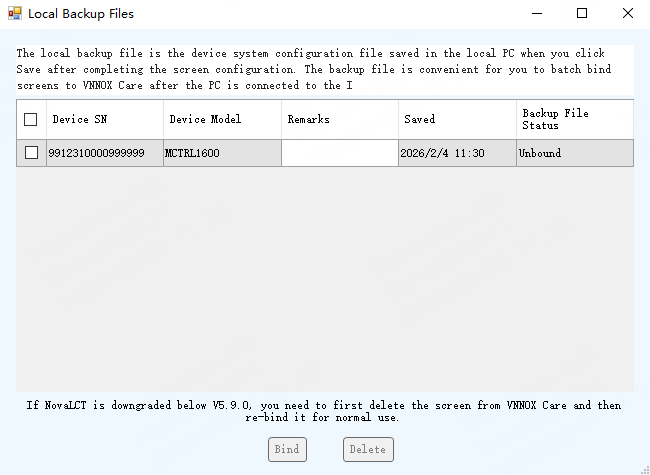
- Select one or more backup files and click Bind.
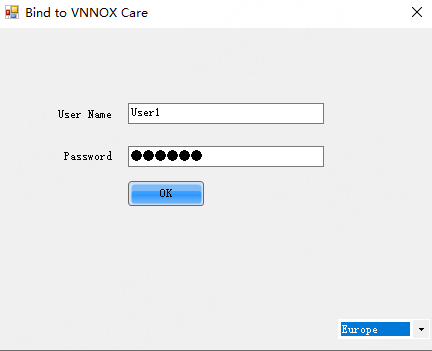
- Select the monitoring data file (.oscfg) of the screen to be bound, select a server node, enter your VNNOX Care user name and password, and then click OK to bind the offline screen.
Export Screen Monitoring Data
- After the screen configuration is done, click Export Screen Monitoring Data on the screen configuration page of NovaLCT.
- Enter a file name, click ... to specify a location, and click Save.
- After the data is saved successfully, click OK to close the window.
- In VNNOX Care, bind screens by importing local files.
# 1.5 Back up Screen System Files and Manage Screen Data with VNNOX Care
In the previous steps, you have successfully bound a screen to VNNOX Care during construction. Now, you can use VNNOX Care to manage your screen.
Before managing your screen, make sure that the screen system configuration files have been backed up to the cloud. If a hardware device is replaced or a configuration file is lost, you can log in to VNNOX Care and download the backup file to recover your screen timely. In the after-sales service process, you can also update the backup files, spare parts, parts replacement, warranty, and other data according to the maintenance. VNNOX Care can serve as a tool for handover of the work of the technical service team.
Before the end of the after-sales service of a project, you can know about the cost of each after-sales service, which can more accurately provide a reference for project profit calculation. In addition, the effectiveness of technical services will be comprehensively improved.
This section introduces how to back up screen system configuration files and manage screens bound to VNNOX Care so as to make screen operation and maintenance more efficient.
You will learn the following:
- How to back up screen system configuration files
- How to manage screen data
# 1.5.1 Back up Screen System Configuration Files
If you choose to bind a screen to VNNOX Care by backing up configuration files during construction, the system configuration files and screen data can be automatically backed up while the screen is being bound.
# 1.5.2 Manage Screen Information
From VNNOX Care homepage, choose Screen O&M > My Screens to access the screen details page and manage the screen data as required.
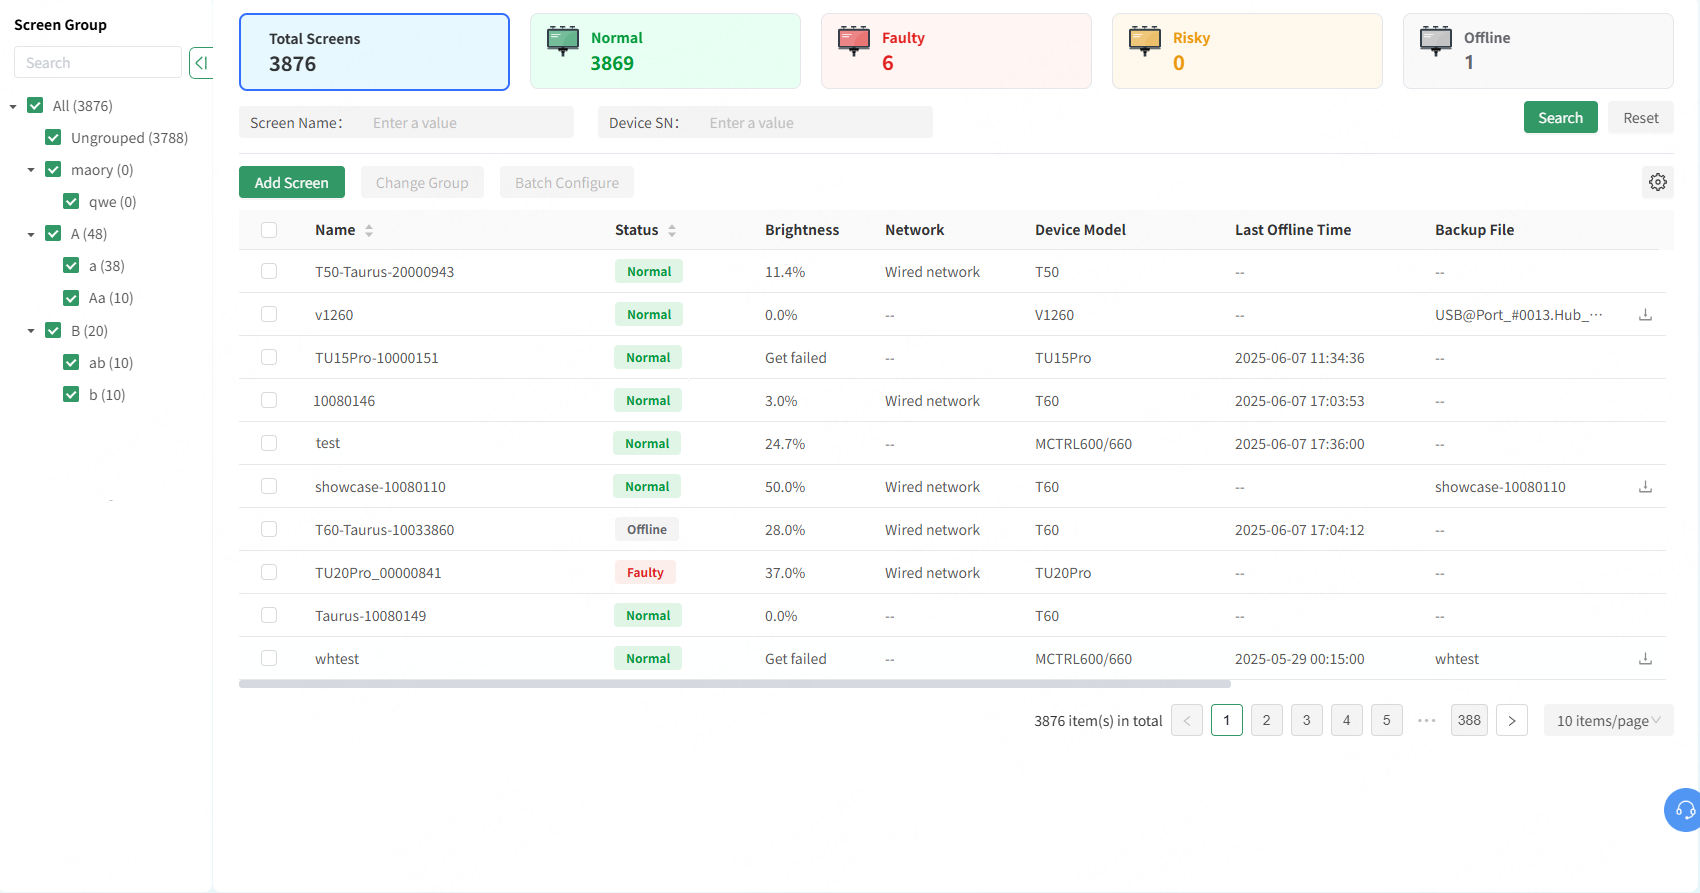
Basic Information
- After clicking a screen name, select the Monitoring tab and click Edit to edit the screen name, time zone, application scenario, and screen type. Click the screen address or to manually adjust the screen location. This makes it convenient for future monitoring and maintenance.

Assets
After clicking a screen name, select the Assets tab to manage assets.
- Obtain backup files (the screen must be bound by backing up configuration files with NovaLCT): If a hardware device is replaced or a configuration file is lost, you can download the uploaded backup files to recover your screen in a timely manner.
- Backup files include sending card configuration file, receiving card configuration file, screen connection file, and receiving card version/NovaLCT version.

- Manage parts replacement information: You can record spare parts and part replacement during construction and maintenance, which makes it convenient to prepare the parts for the next maintenance.
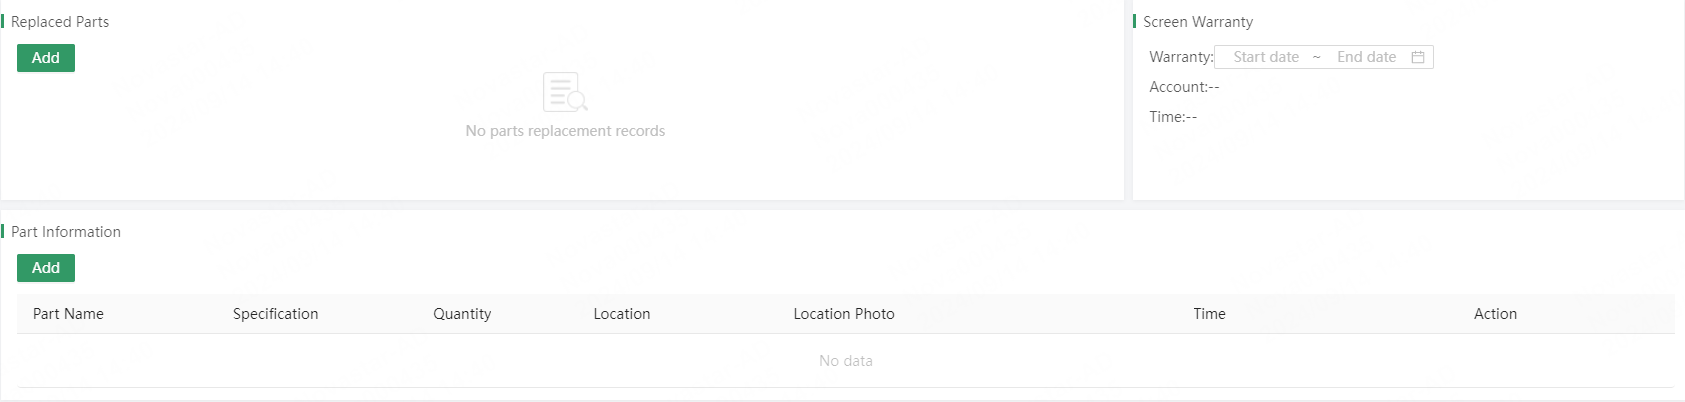
- Manage warranty information: You can record the warranty information of the entire screen and accessories, making it convenient to confirm whether an item requiring maintenance is within the warranty period.
