
Rule Templates
# Configure Alarm Rules
When a screen malfunctions, the system will generate different levels of alarms and alarm log information according to the default alarm rules.
After subscribing to the alarm notifications, you will be informed of the screen problems anywhere, anytime. The alarm information will be sent to you as an email, which is very convenient for you to quickly find and deal with the problem. You can also customize the alarm level based on the device and scenario differences to configure personalized alarm rules.
# Configure Alarm Notifications
- From the navigation bar on the left, choose Screen O&M > Rule Templates to access the rule template management page.
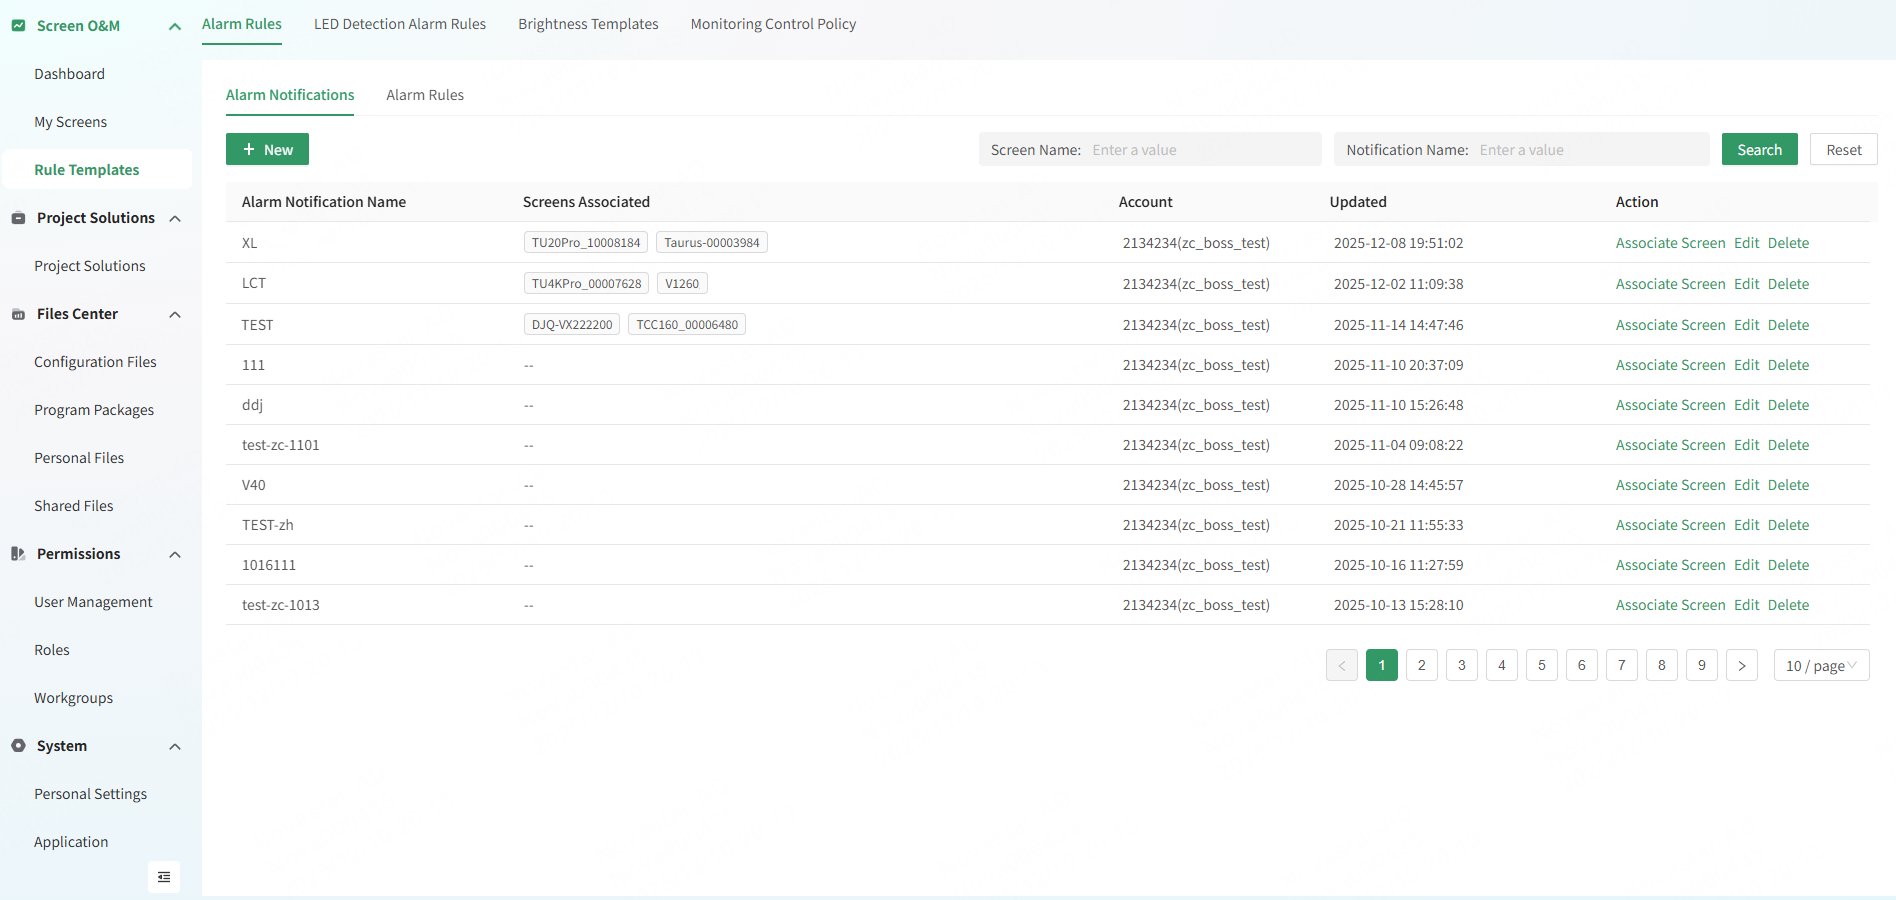
- On the Alarm Rules tab page, select Alarm Notifications and click New to create alarm notification configuration .
- Enter an alarm rule name.
- Choose whether to receive alarm notification. If you want to receive it, enter an email address that receives the notification. Otherwise, you will not receive the alarm information.
- Set the time zone of the region where the recipient is in and the time when the recipient receives the emails. The system will send alarm emails to the recipient according to the local time.
- Set the daily notification limit for a single alarm option.
- Set the notification time for the screen’s online/offline status, and enable notifications.
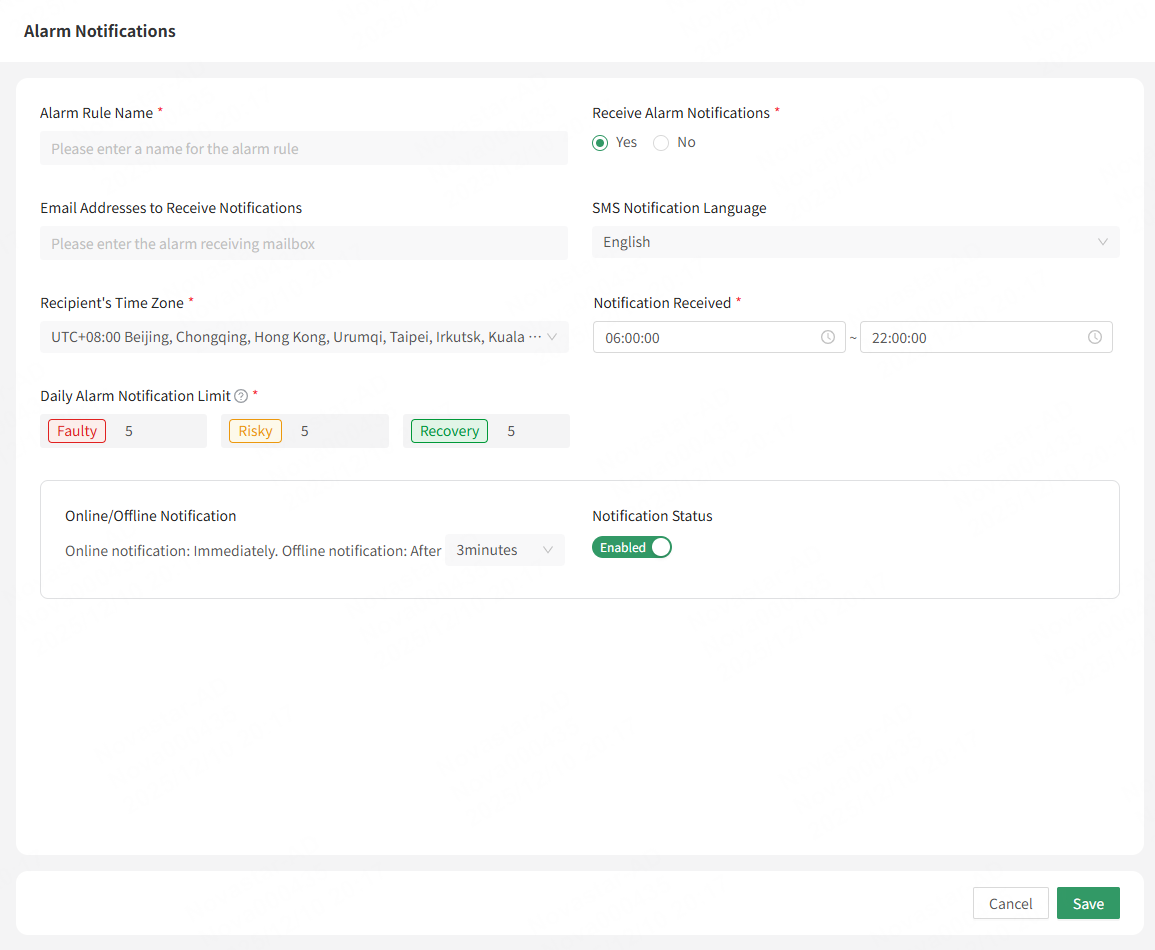
- Click Save to complete alarm notification configuration.
- (Optional) Go back to the Alarm Notifications page and do the following as required in the Action column.
- Associate Screen: In the Screens Associated window that appears, select screens, click
 , and then click OK.
 - Edit: Edit the rule. After editing, click OK.
- Delete: Delete the rule.
# Configure Alarm Rules
# Notes
- For screens without a monitoring card or smart module, the relevant alarm rules are ineffective.
- For NovaLCT V5.9.0 and later, configuring alarm rules is unnecessary.
# Operating Procedure
- From the navigation bar on the left, choose Screen O&M > Rule Templates to access the rule template management page.
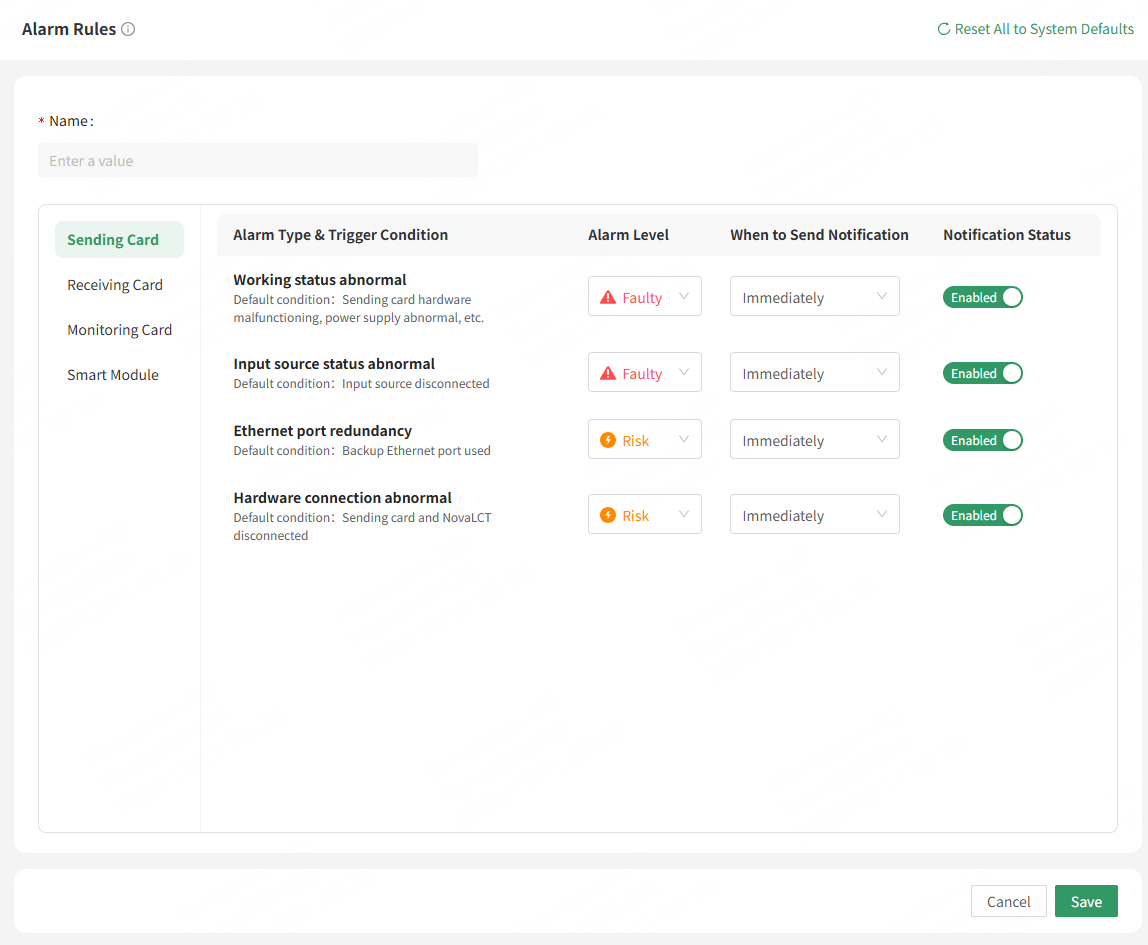
- On the Alarm Rules tab page, select Alarm Rules and click New to create alarm rule configuration.
- Enter an alarm rule name.
- Set alarm level. Faulty and Risky are optional.
- Set the trigger condition. Set the normal range for the alarm item (the range boundary value must be within the default range value of the system), and the system will trigger an alarm outside the normal range value.
- Set the notification triggering method. You can choose to trigger the notifications immediately or at intervals of 1, 3, 5, or 10 minutes.
- Enable or disable notifications.
- Configure the alarm rules.
- Set alarm level. Faulty and Risky are optional.
- Set the trigger condition. Set the normal range for the alarm item (the range boundary value must be within the default range value of the system), and the system will trigger an alarm outside the normal range value.
- Set the notification triggering method. You can choose to trigger the notifications immediately or at intervals of 1, 3, 5, or 10 minutes.
- Enable or disable notifications.
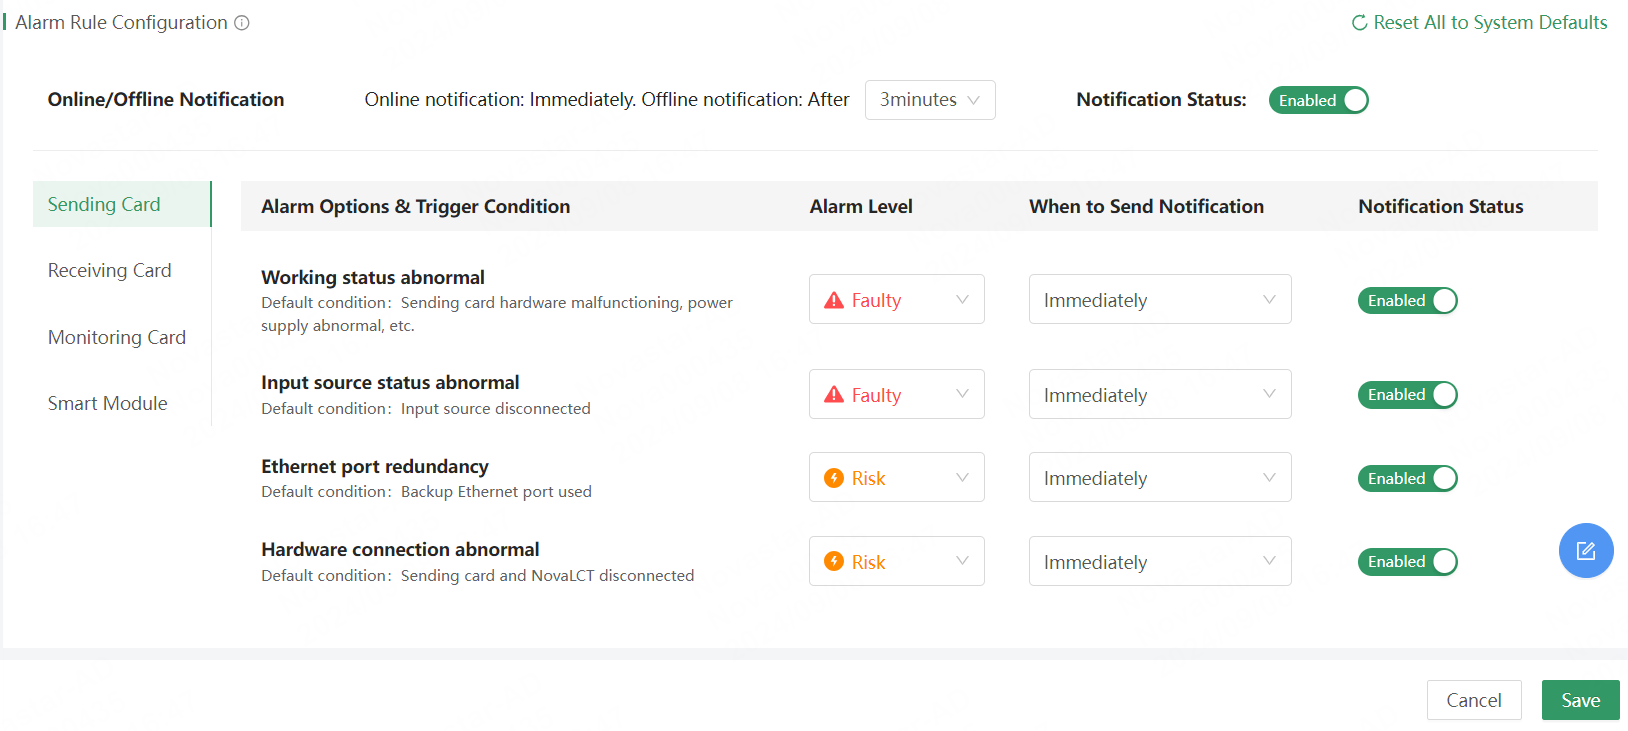
- Click Save to complete alarm rule configuration.
Notes:
- Before the resolution of a problem, the risk level is notified only once, and fault level is notified only once.
- Click **Reset All to System Defaults** to reset all alarm rules to the system defaults.
- (Optional) Go back to the Alarm Notifications page and do the following as required in the Action column.
- Associate Screen: In the Screens Associated window that appears, select screens, click , and then click OK.
- Edit: Edit the rule. After editing, click OK.
- Delete: Delete the rule.
# LED Detection Alarm Rules
- From the navigation bar on the left, choose Screen O&M > Rule Templates to access the rule template management page.
- On the LED Detection Rules tab page, click New Rule to create an LED detection rule.
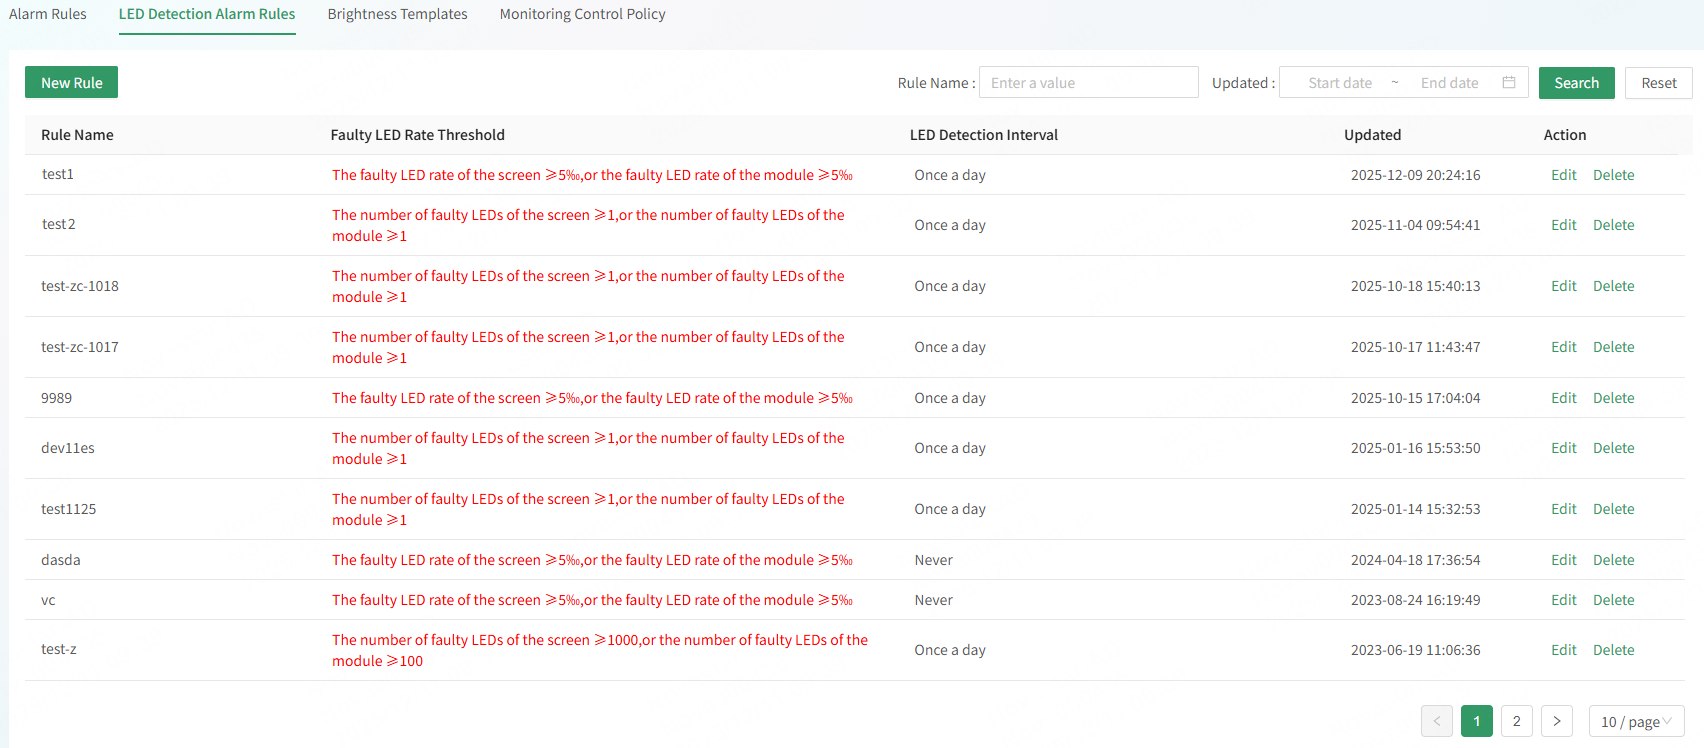
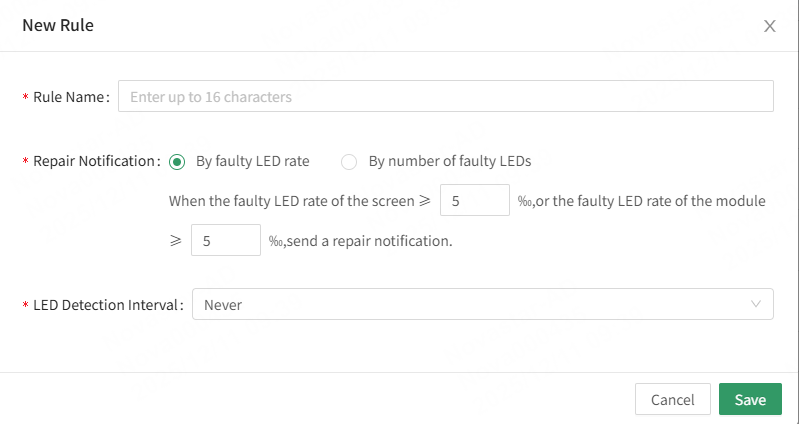
- Rule Name: Enter a name for the new alarm rule.
- Repair Notification: Select By faulty LED rate or By number of faulty LEDs and specify the corresponding values.
- Detection Interval: Select a detection interval.
# Manage Brightness Templates
- From the navigation bar on the left, choose Screen O&M > Rule Templates to access the rule template management.
- On the Brightness Templates tab page, click New.
- In the Brightness Rule Configuration window that appears, enter a template name and click Add. In the Add window that appears, specify the rules.
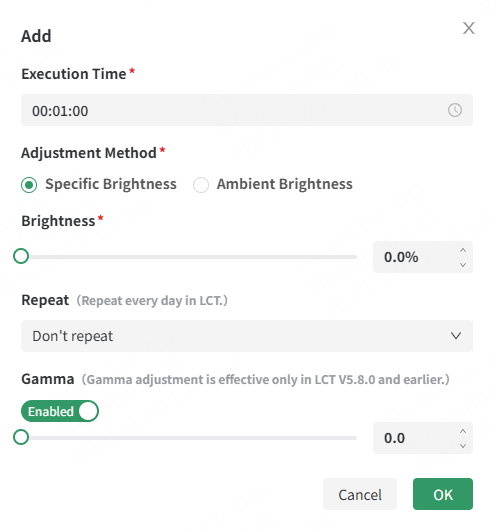
- Execution Time: Specify a time to execute the rule.
- Adjustment Method: Includes Specific Brightness and Ambient Brightness (requiring light sensors)
- Brightness: When Specific Brightness is selected as the adjustment method, the brightness value needs to be set. The screen brightness can be adjusted by dragging the slider.
- Gamma: After Gamma is enabled, drag the slider to specify a Gamma value.
- After the settings are done, click OK.
- (Optional) Add an ambient brightness mapping table when Ambient Brightness is selected.
The brightness mapping table divides ambient brightness into several ranges. Specify each range a corresponding screen brightness, then specify the interval and number of times to collect the brightness. The screen brightness automatically adjusts according to the range of the collected ambient brightness.

If the light sensor fails to read the ambient brightness, enabling brightness adjustment to adjust screen brightness manually. After this is disabled, this mechanism will not take effect.
Click Quick Subsection to specify an ambient brightness range and screen brightness range and then click OK.
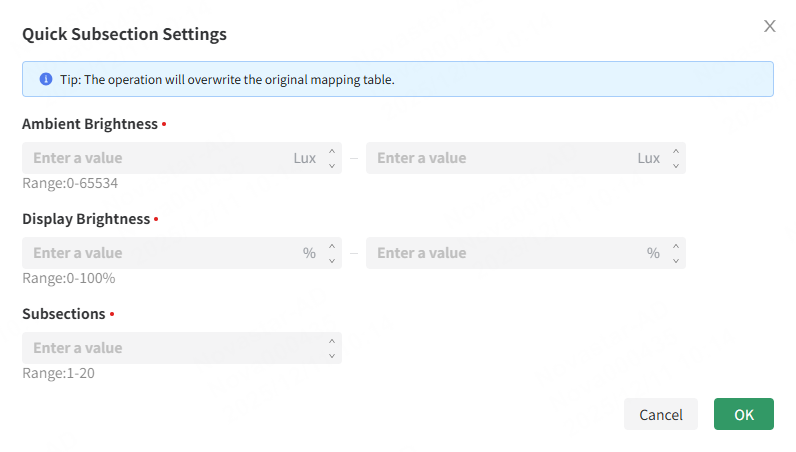
Creating a quick subsection will overwrite the existing mapping records. To proceed, click OK in the dialog box that appears.
After the settings are done, the screen brightness corresponding to each ambient brightness can be viewed in the brightness configuration page.
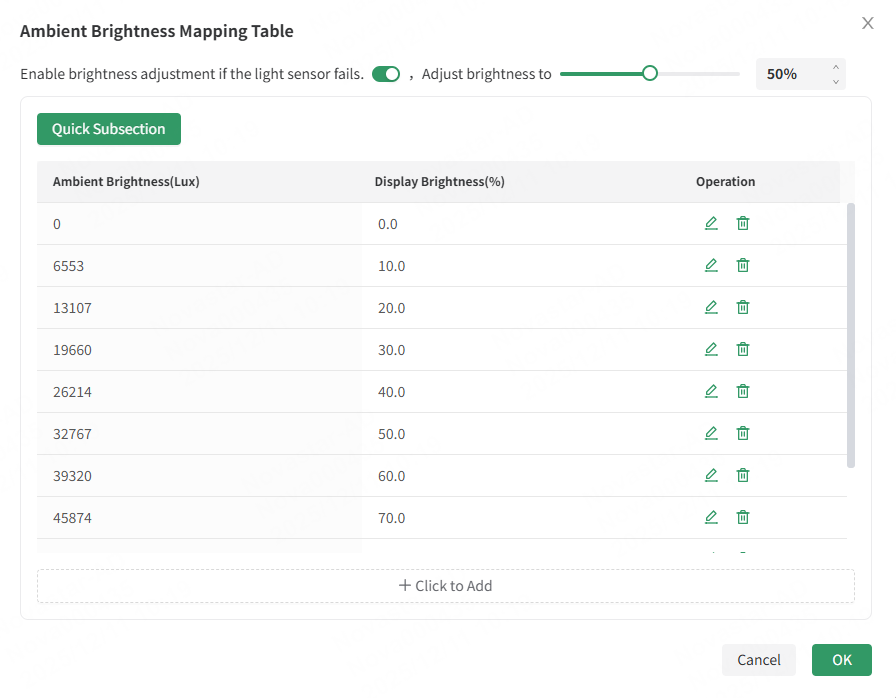
To quickly adjust the ambient and screen brightness, click Click to Add, enter the desired values, and then click OK.

- (Optional) Go back to the Alarm Rules page and do the following as required in the Action column.
- Associate Screen: In the Screens Associated window that appears, select screens, click
 , and then click OK.
 - Edit: Edit the rule. After editing, click OK.
- Delete: Delete the rule.
# Manage Monitoring Control Policy
- From the navigation bar on the left, choose Screen O&M > Rule Templates to access the rule template management.
- On the Monitoring Control Policy tab page, click New.
- In the Add Monitoring Control Policy window that appears, enter a template name, set the trigger condition and enable it.

- After the settings are done, click OK.
- (Optional) Go back to the Alarm Rules page and do the following as required in the Action column.
- Associate Screen: In the Screens Associated window that appears, select screens, click
 , and then click OK.
 - Edit: Edit the rule. After editing, click OK.
- Delete: Delete the rule.