Manage Permissions

This chapter will introduce how to use VNNOX Care to create sub-accounts, assign permissions to the accounts, associate screens and projects with the accounts, etc.

# Workgroups

Associate users with resources by allocating the users and resources (including screens, projects, work orders and after-sales orders) to the same workgroup to enable user and resource management by workgroup.

  1. From the navigation bar on the left, choose Permissions > Workgroups.
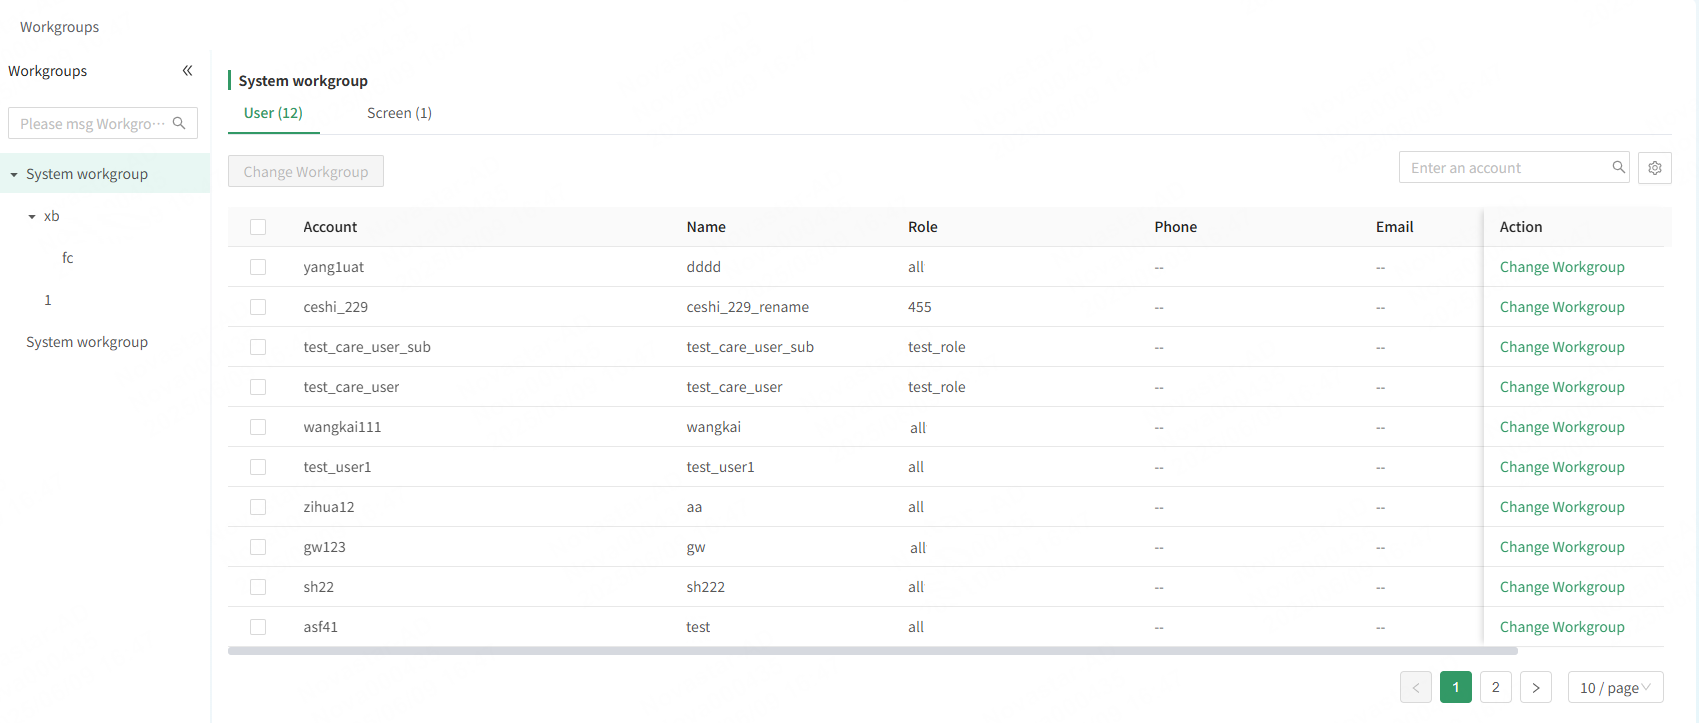
  1. View the workgroup tree, or search for a workgroup by name. (The users, screens, projects, work orders and after-sales orders allocated to the workgroup are displayed.)

  2. Create sub-workgroups.

a. Hover the mouse over a workgroup name and click .

b. Enter a name for the sub-workgroup and click OK.

  1. Change the workgroups of users and resources. (In case of team member turnover or position changes, the users and resources such as screens in a workgroup can be quickly changed.)

a. On a user list or resource list, click Change Workgroup in the Action column.

b. Select a workgroup and click OK.

# Roles

A role is a collection of permissions. Create a role and assign permissions to the role. Users related to this role will have the permissions so as to protect information and prevent data breaches.

  1. From the navigation bar on the left, choose Permissions > Roles.

  1. Create roles.

a. Click New Role.

b. Enter a name and description for the role.

c. Assign permissions to the role.

d. After the settings are done, click OK.

  1. (Optional) Click Edit in the Action column to reassign permissions to the role. (In case of team member turnover or position changes, the original account can be kept and permissions can be reassigned.)

# Users

A primary account for VNNOX Care has all the permissions and can create multiple sub-accounts.

  1. From the navigation bar on the left, choose Permissions > User Management.

  1. Create users.

a. Click New User and set the following information.

b. After the settings are done, click OK.

  1. Modify user information.

a. Click Edit in the Action column.

b. Modify the name, workgroups, roles and status of the user. (A user can belong to multiple workgroups and multiple roles can be assigned to a user.)

c. After the modification is done, click OK.

Notes:

  1. Reset password: The owner of an account can be changed with the original permissions kept.

  2. Enable/Disable account: In case of team member resignation or turnover, an account can be quickly disabled to prevent business data breaches.